Saturday, January 5, 2013

2nd House Remodel: Basement Part 8 - Play-house

This was easily the most fun project I've done.  A friend of mine built a new house in our neighborhood a couple years ago and had his builder add a small playhouse using the typically wasted space beneath their stairs.  Since I have two little girls, I decided this was something I wanted to do.

So, a couple years ago Laura wanted to head out to Utah to visit her friend while I went off to a wrestling camp.  There were a few days on either side of the camp where I worked on the playhouse and some tile projects.  I took progress photos of all of them, but I appear to have lost them when I changed phones a few times these last 2 years.

I didn't have a lot of space to play with, so I fit in a small window with a planter box underneath and made a door that resembles a gate you might built in a picket fence.  Beside that there is just a small light in the playhouse, carpet, and some trim.  I also made a chalkboard on the wall outside the playhouse using some panel moulding and chalkboard paint.

Needless to say, the girls REALLY liked their new playhouse and chalkboard!

The only "in progress" shot I still have.  Boo.
Window, planter box and chalkboard. 
Another view of the window an planter box.
Window and door.
Door, latch, and entrance.
Door trim and hinge detail.
From inside.

2nd House Remodel: Basement Part 7 - Family Room Shelves

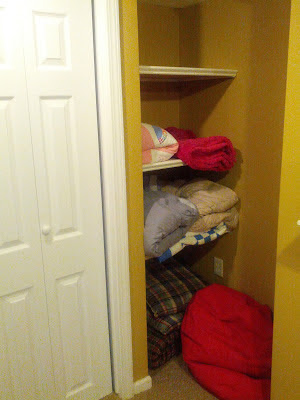
Another small project.  I had some grand plans for very elaborate built-in shelving surrounding the basement fireplace, but ultimately as my decision to change careers led us to put our house on the market to move closer to school and my job, I decided to do something a bit less.  Still, I think it worked out nicely.  We use these shelves to stack the blankets and pillows we keep in the basement.


Shelves added!  I built them during the process of
repainting the basement.
Close-up of shelf edge trim.
Closer view.
In use!

2nd House Remodel: Basement Part 6 - Ledge Upgrade

This was a fun and quick update project.  I just couldn't stand how boring the ledges on the southeast and southwest corners of the house ended up, so I finally got around to updating them, increasing the size of the ledge and adding some trim built-up underneath the ledge.


Original family room ledge...BORING!  8in ledge, barely reaches the edge
of the drywall.
Another view of the original family room ledge.

Original large bedroom ledge.  8in ledge barely reaches the edge of the
drywall.
Updated family room ledge. Paint unfinished in this picture, but
a big improvement.  This is now a 12in ledge.
Another view of the updated family room ledge.
Large bedroom updated ledge, now a 10in ledge.
Also paint unfinished in this picture, but gives you an
idea of the trim built-up underneath the ledge.

2nd House Remodel: Basement Part 5 - Storage Shelves

This is a quick one, but couldn't find another place to stick it.  I built some storage shelves in the storm shelter underneath our front porch.  You enter it from the basement, so it's just like another room in the basement, except it's about 6ft x 20ft and surrounded by triple-reinforced concrete.  We needed shelves for our food storage and other various "stuff", so I added shelving to one side of the room, leaving the other side open for boxes and more "stuff".  I love "stuff", especially the kind that has sat in your storm shelter in the same spot for almost 7 years.  Yup, that was sarcasm folks.


Entrance to the storm shelter, unfinished.  Basement bath is stubbed to the left.
East side of storm shelter.
West side of storm shelter.
Entrance to storm shelter during basement framing phase.
Note the basement bath now framed to the left.
Shelving.  Nothing spectacular here, just documenting the project :).


2nd House Remodel: Basement Part 4 - Family Room

I initially designed the family room differently, as I explained in this post.  The first picture below is of the small (7x14) office I framed.  There was to be a small window on the office wall to give a view of the rest of the basement and let us keep an eye on the kids.  After some internal debate I decided to rip it out and instead I built the fireplace you see below as the focal point of the family room, shifting the area where a TV would be installed 90 degrees from the West wall to the North wall.  I definitely like this arrangement better.  There is some extra space for kids toys now behind our couch, and it makes basement appear much cozier and a bit less utilitarian.  

Office partially framed, later scrapped for the fireplace.
Fireplace framed, wiring closet also to the left.
More of the fireplace and wiring closet.
Fireplace showing some of the ceiling above.
This ceiling area allows for cabling or whatever to be
installed throughout the finished basement.
You've seen this already if you read post 2, but here
is a pic of the back of family room, with the fireplace
 unseen to the right.
Partially sheet rocked
Sheet rocked

Another angle sheet rocked.  Getting rid of all that scrap sheet rock was
a horrible job.
Partially finished fireplace area, new mantle up and fireplace installed.
Side shelves installed, but still some trim work needed.
View from back of family room toward kitchenette and 2nd bedroom.
Baseboard trim and carpet down!
Fireplace view, mostly done.
View of 2nd bedroom wall and entry way.
Finished.  Note the crown moulding added.
Detail of right side fireplace built-in.
Left side fireplace built-in.
Fireplace close-up.
Crown close-up

Tuesday, January 1, 2013

2nd House Remodel: Basement Part 3 - Kitchenette

The kitchenette was something I went round with a few times, thinking I wanted a bar at one point, then deciding against it in favor of an L-shaped corner cabinet configuration, then back to the bar idea, then to a more basic since cabinet.  It's a fairly small space, so it was difficult figuring out exactly how much of it to use, and how to take advantage of the open area around it.  But, since we are not big "entertainers", I went with the most simple design.  Nothing terribly special here.  I did decide, sort of spur-of-the-moment, to add some lighting above the cabinets (Christmas lights).  You can see them in the last picture.  It was a wild hair I got while I was finishing the electrical work.  I just had to install an outlet inside the cabinets, then drill some small holes in the cabinet top to be able to push the cord through.  


Framed kitchenette
Framed and partially sheet rocked
Sheet rocked
Sheet rocked from the other angle
Partially finished
From inside the rec room
Yet another angle, finished
Another view of the rec room, finished
Finished, shows some of the lighting
View down the "hall"
Close-up of counter-top, more to come on that in a later post (plumbing!)
Shows a little bit of the lighting above the cabinets
Close-up of cabinets
Lighting above cabinets.


About 2 years laters I finally got around to finishing the bathroom, and at the same time I added a sink to the kitchenette, which you can see in the picture just above.  Here are some more pictures of the finished product.  Again, nothing terribly great added here, just a sink and a backsplash.  The backsplash did force me to remove an outlet that was really unecessary, data and TV connections.  Hey, I'm an IT guy.  I want connections everywhere.  Please ignore the unfinished tile work in these pictures.


Note that I was also re-painting at the time.
This is the 3rd color we used in the basement.
Finally found one we liked.

Another view.

Another view, close-up